
Installing a PDF print server on Ubuntu Server
This article was originally written for Ubuntu 7, but we now know it works for Ubuntu 10 as well. Thanks Shooda!
- To start, install the CUPS service and CUPS-PDF files:
sudo apt-get install cupsys sudo apt-get install cups-pdf
- Now configure CUPS to allow remote administration:
sudo nano /etc/cups/cupsd.confModify the port where CUPS listens from:
Listen localhost:631
to:
Listen 631
Listen /var/run/cups/cups.sock
Listen 192.168.1.1:9100
The 192.168.1.1:9100 address allows you to connect to CUPS using the server’s network interface (192.168.1.1) on port 9100. I chose that port because that is the default port for HP printers (you can use the default port 631). Also modify these options to match the ones here:
# Show shared printers on the local network.
Browsing On
BrowseOrder allow,deny
BrowseAllow all
BrowseAddress @LOCAL

# Default authentication type, when authentication is required...
DefaultAuthType Basic
DefaultEncryption Never

# Restrict access to the server...
<Location />
  Order allow,deny
  Allow all
</Location>

# Restrict access to the admin pages...
<Location /admin>
  Order allow,deny
  Allow all
</Location>

# Restrict access to configuration files...
<Location /admin/conf>
  AuthType Basic
  Require user @SYSTEM
  Order allow,deny
  Allow all
</Location>
What you just did was to allow remote administration from any computer on the network. The DefaultEncryption option was to avoid the error:
426 - Upgrade Required when using the CUPS web interface
- Restart the CUPS service:
sudo /etc/init.d/cupsys restart
- Ubuntu 7 Only: To perform administrative task remotely CUPS will ask you for a password. So let’s allow CUPS to read the password file:
sudo adduser cupsys shadow
- Ubuntu 8 Only: AppArmor seems to cause a remote connection problem, so execute the following command to fix it
sudo aa-complain cupsd
- It’s time to check you can access it from another computer. Open a web browser and type the following address:
http://192.168.1.1:9100
You should see the CUPS page.
- To add the PDF printer from the CUPS page click on Administration

- Click on Add Printer

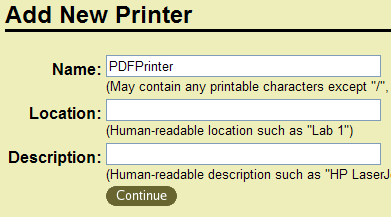
- Type a name for your printer, for example PDFPrinter and click Continue
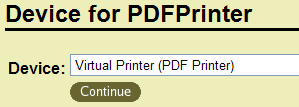
- Ubuntu 7 Only: Select Virtual Printer (PDF Printer) and click Continue
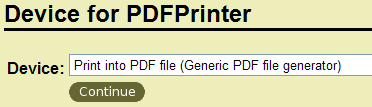
- Ubuntu 8 Only: Select Print into PDF File (Generic PDF file generator) and click Continue
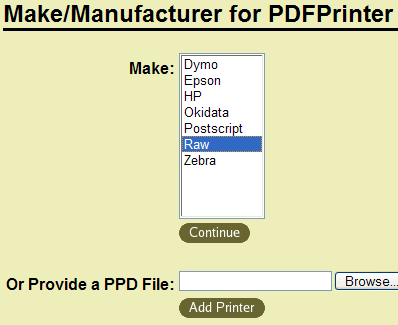
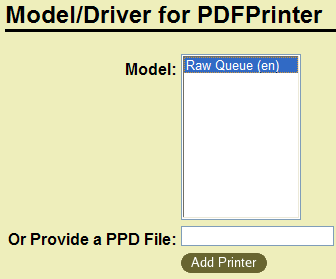
- Select Raw and click Continue
- Select Raw Queue (en) and click Add Printer
- By now your print server is ready to accept conections. So let’s configure Windows. From the Add Printer Wizard select A network printer, or a printer attached to another computer.
- Select Connect to a printer on the Internet or on a home or office network and type:
http://192.168.1.1:9100/printers/PDFPrinter
where PDFPrinter is the name you assigned it some steps before.
- Following the recommendation of Joe Brockmeier, select the HP DeskJet 1200C/PS driver
- And now it’s time to send a test page! Your PDF files will be under
/var/spool/cups-pdf/ANONYMOUS/
If you want to change that directory you can:
- Open your cups-pdf configuration file:
sudo nano /etc/cups/cups-pdf
- And change this line:
AnonDirName /path/to/your/pdf/files
I recommend you to install the Apache Web Server to let users access their PDF files. You can do this by pointing AnonDirName to a subdirectory of Apache. Also you should configure a cron job to automatically delete jobs older than 1 hour or so. I want to thank
Joe Brockmeier and metalhippyrich for their excellent pages on this topic. Best Regards!