Installing Lucene/Solr on CentOS 6
This time we are going to install Solr, the super text search platform on CentOS. The installation process requires a couple extra libraries in order to work: Apache Commons Logging and SLF4J.
Installing Java
yum install java
java -version
You must have at least version 1.6 in order to run Solr. If you got Java 1.5, I recommend you to follow this tutorial to get version 1.6.
Installing Tomcat
yum -y install tomcat6 tomcat6-webapps tomcat6-admin-webapps
chkconfig tomcat6 on
service tomcat6 start
Use a web browser to check it is working correctly.
http://localhost:8080/
If you cannot connect, check your firewall rules
iptables -vnL --line-numbers
and make the necessary changes (Check these iptables snippets).
Ok, let’s go on. Add the following lines between the <tomcat-users> tag in /etc/tomcat6/tomcat-users.xml to add a manager role to your server:
<role rolename="manager" />
<role rolename="admin" />
<user username="AUserName" password="ASuperSecretPassword" roles="manager,admin" />
Important: Make sure to change the previous username and password!
Restart Tomcat
service tomcat6 restart
Installing Apache Commons Loggins Download Apache Commons Logging from
http://commons.apache.org/proper/commons-logging/download_logging.cgi to your home directory.
Untar your file and copy the required files to your tomcat library folder:
cd
tar zxf commons-logging-1.1.3.tar.gz
cd commons-loggins-1.1.3
cp commons-logging-*.jar /usr/share/tomcat6/lib
Installing SLF4J Download the latest version from
http://www.slf4j.org/ to your home directory. Untar your file and copy the required files to your tomcat library folder:
cd
tar zxf slf4j-1.7.5.tar.gz
cd slf4j-1.7.5
cp slf4j-*.jar /usr/share/tomcat6/lib
Update: Latest versions include a couple Android files (slf4j-android-1.7.7.jar and slf4j-android-1.7.7-sources.jar). Do not copy them. They will be read by tomcat preventing Solr to start.
Installing Solr (Finally!) Download Solr from the Apache website to your home directory:
http://lucene.apache.org/solr/downloads.html
Uncompress it:
cd
tar zxf ~/solr-4.5.1.tar.gz
Copy (and rename) the included Solr war file (solr.war) to your Tomcat apps folder:
cp ~/solr-4.5.1/dist/solr-4.5.1.war /usr/share/tomcat6/webapps/solr.war
Now it’s time to create the folder that will keep your Solr index and documents. We also have to copy a basic Solr structure into it. Fortunately, Solr comes with a predefined structure and includes preconfigured files in it. You have to make sure that there is plenty of space wherever you place this folder, since it can grow a lot. By the way, you can place this folder out of your Tomcat webapps folder. In my case, I have decided to put it in /home/solr. So, let’s do it:
mkdir /home/solr
cp -R ~/solr-4.5.1/example/solr/* /home/solr
chown -R tomcat /home/solr
Restart Tomcat.
service tomcat6 restart
Solr is not ready yet, however this last time we restarted Tomcat it unpackaged the solr.war file. We need to edit a file inside that unpackaged directory structure. Edit your Solr web.xml file to let it know where your solar directory is located:
nano /usr/share/tomcat6/webapps/solr/WEB-INF/web.xml
Look for the following code and edit it (don’t forget to remove the comment markers!):
<env-entry>
    <env-entry-name>solr/home</env-entry-name>
    <env-entry-value>/home/solr</env-entry-value>
    <env-entry-type>java.lang.String</env-entry-type>
</env-entry>
Ok… so, restart Tomcat
service tomcat6 restart
On your web browser go to:
http://localhost:8080/solr
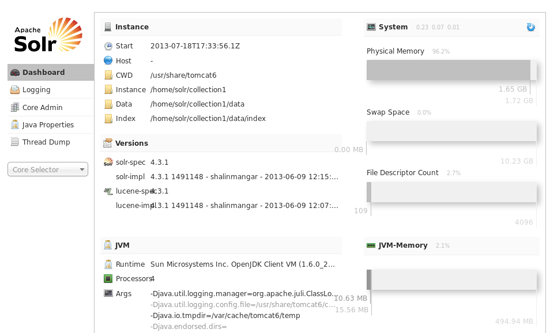
If everything is ok, your Solr instance should be ready to go.
Troubleshooting
I recommend you to completely stop and start Tomcat over and over and take a look at:
tail /var/log/tomcat6/catalina.out
If you do not restart Tomcat each time, errors will not be logged to the catalina.out file.

