
Migrating from WordPress to Hugo
The idea behind migrating to hugo is to avoid having to deal with server and certificate updates, backups and so on. Plus moving a site to a global network, like Netlify’s, comes with the added benefits of quick download speeds and an easy to use deployment process.
Migration steps
- Install the WordPress to hugo Exporter plugin to your WordPress site.
This plugin does not have any configuration settings. You just have to export it.
The plugin does not export comments by default, so make sure to read their site to enable this feature if required.
-
Create a new site following Hugo’s quick start guide, and make sure you create a sample post.
-
Unzip the file created by the WordPress Exporter. Copy all its contents to the newly created Hugo site inside the content\posts directory, except the config.yaml file. Should look like this:
my-hugo-site
  + content
    + some-page
    + posts
      + some-post
      + some-post
    + wp-content
-
Add to
config.toml(on the new Hugo site) any settings you want fromconfig.yaml(from the zip file). Be aware that they have different formats, just make sure to follow the appropriate syntax. -
Test the site locally.
-
Commit to github/gitlab.
-
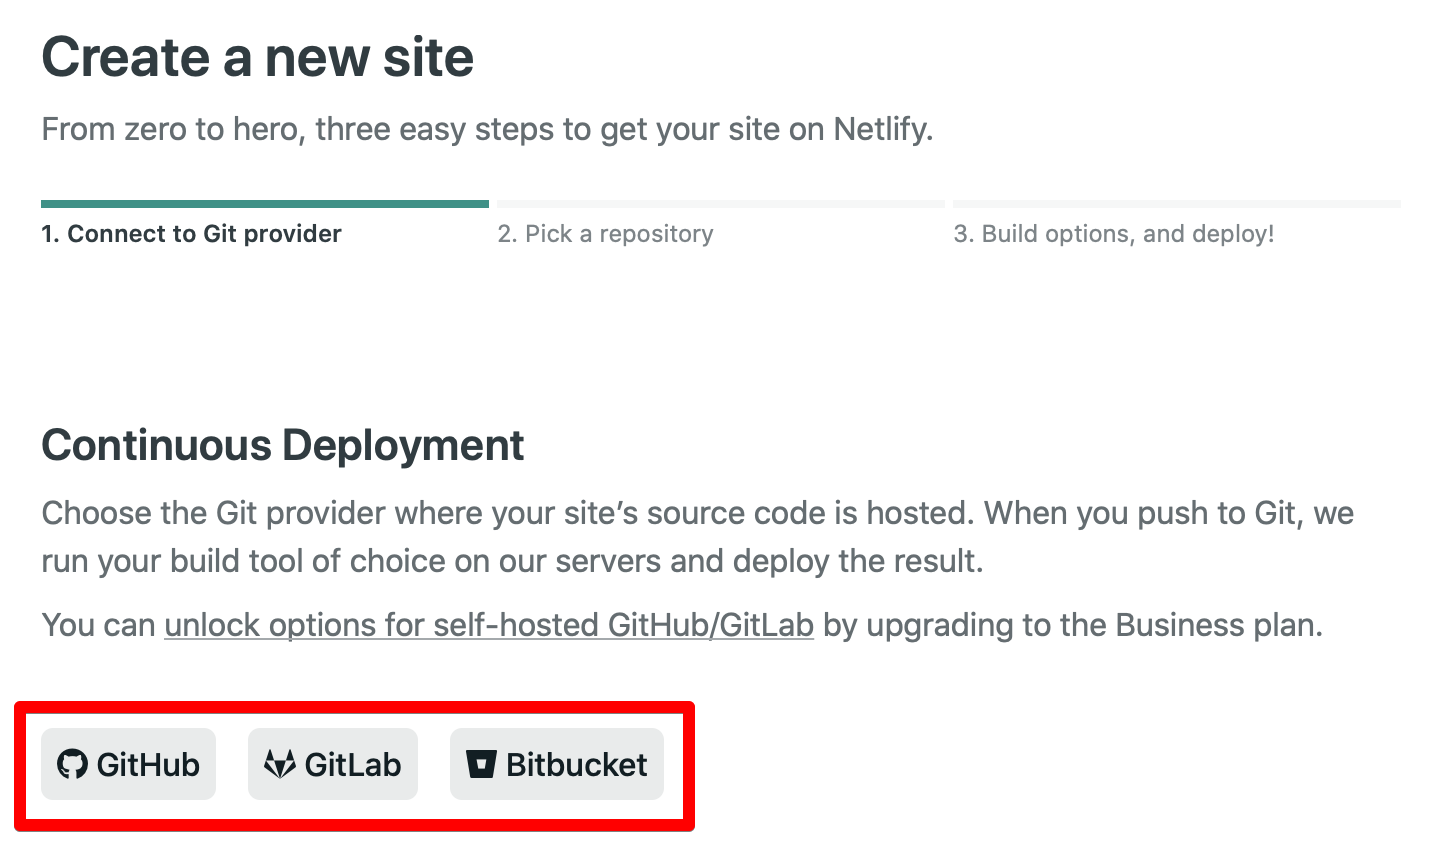
For deploying, go to Netlify and create a New site from Git
-
Link your github/gitlab/bitbucket account.
-
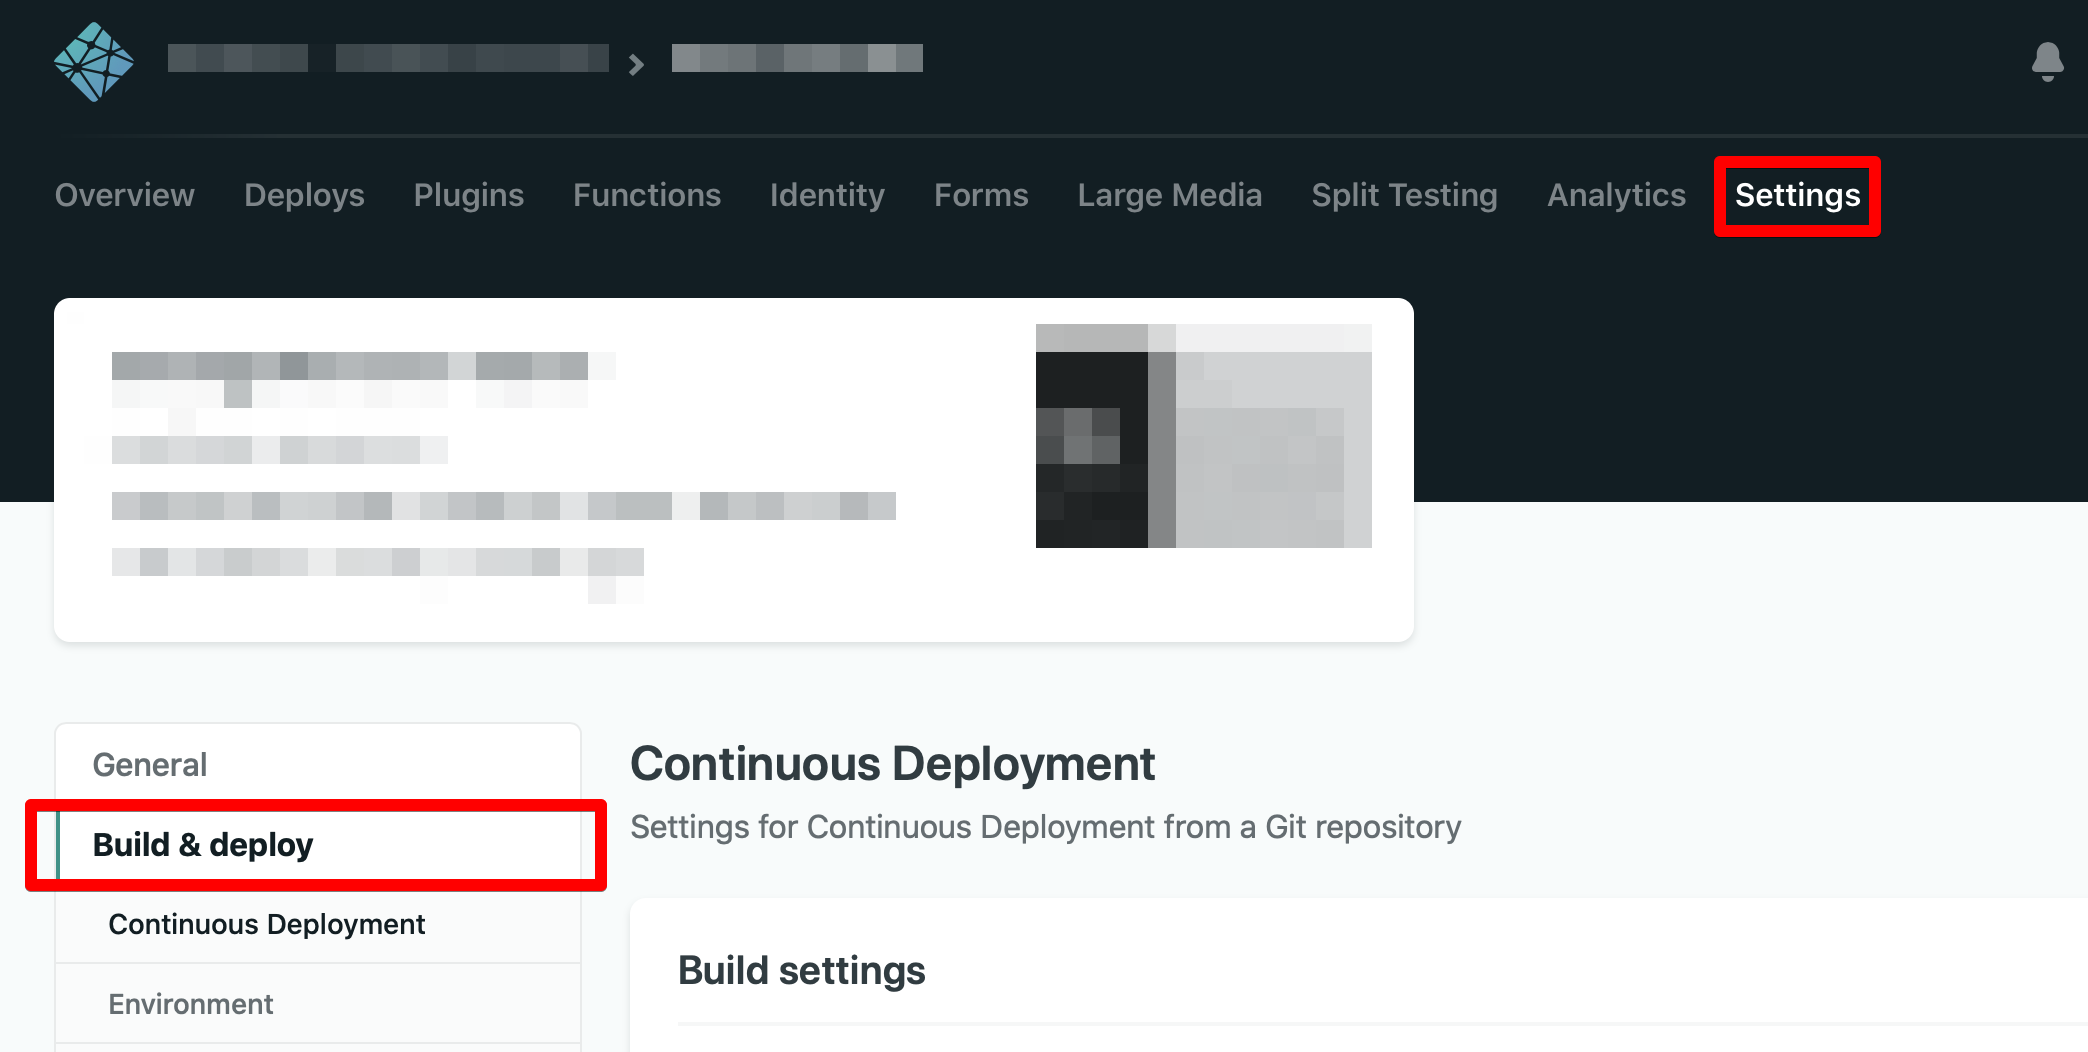
Once in the deployment settings page, select/add:
- Build command: Hugo
- Publish directory: public
- Production branch: master
- Environment variables:
- HUGO_ENV: production
- HUGO_VERSION: 0.74.3
Initial build may fail. Just make sure you have set the previous values and try again.
Double check the value for HUGO_VERSION on local by typing
hugo version
HUGO_ENV is required by the ananke theme. Check your theme and look for any other required variables.
If you need to update the build settings, you can do it on the Build and Deploy Settings page.
-
Netlify will assign a random subdomain name to your site. You can change it by going to
Site Detailson Netlify’s console. The site will be available on a link similar tohttps://my-subdomain.netlify.com. -
Update your DNS. Add an entry like this one:
CNAME www my-subdomain.netlify.com 1 Hour
my-subdomain.netlify.com must be set to the value that you used for the subdomain on the previous step. In this case my-subdomain, hence having a resulting value of my-subdomain.netlify.com.
DNS updates may take several hours (up to two days for full replication).
GoDaddy includes other DNS values, like CNAME _domainconnect, NS @, NS @, and SOA @, which are set automatically by them. You can leave them there. Other unused ones can be removed.
- Add your www and non-www domains (
www.mydomain.comandmydomain.comin our example) to Netlify by using the Domain Management settings. Set the www version as primary.
Here’s why you have to setup the www domain as the primary one.
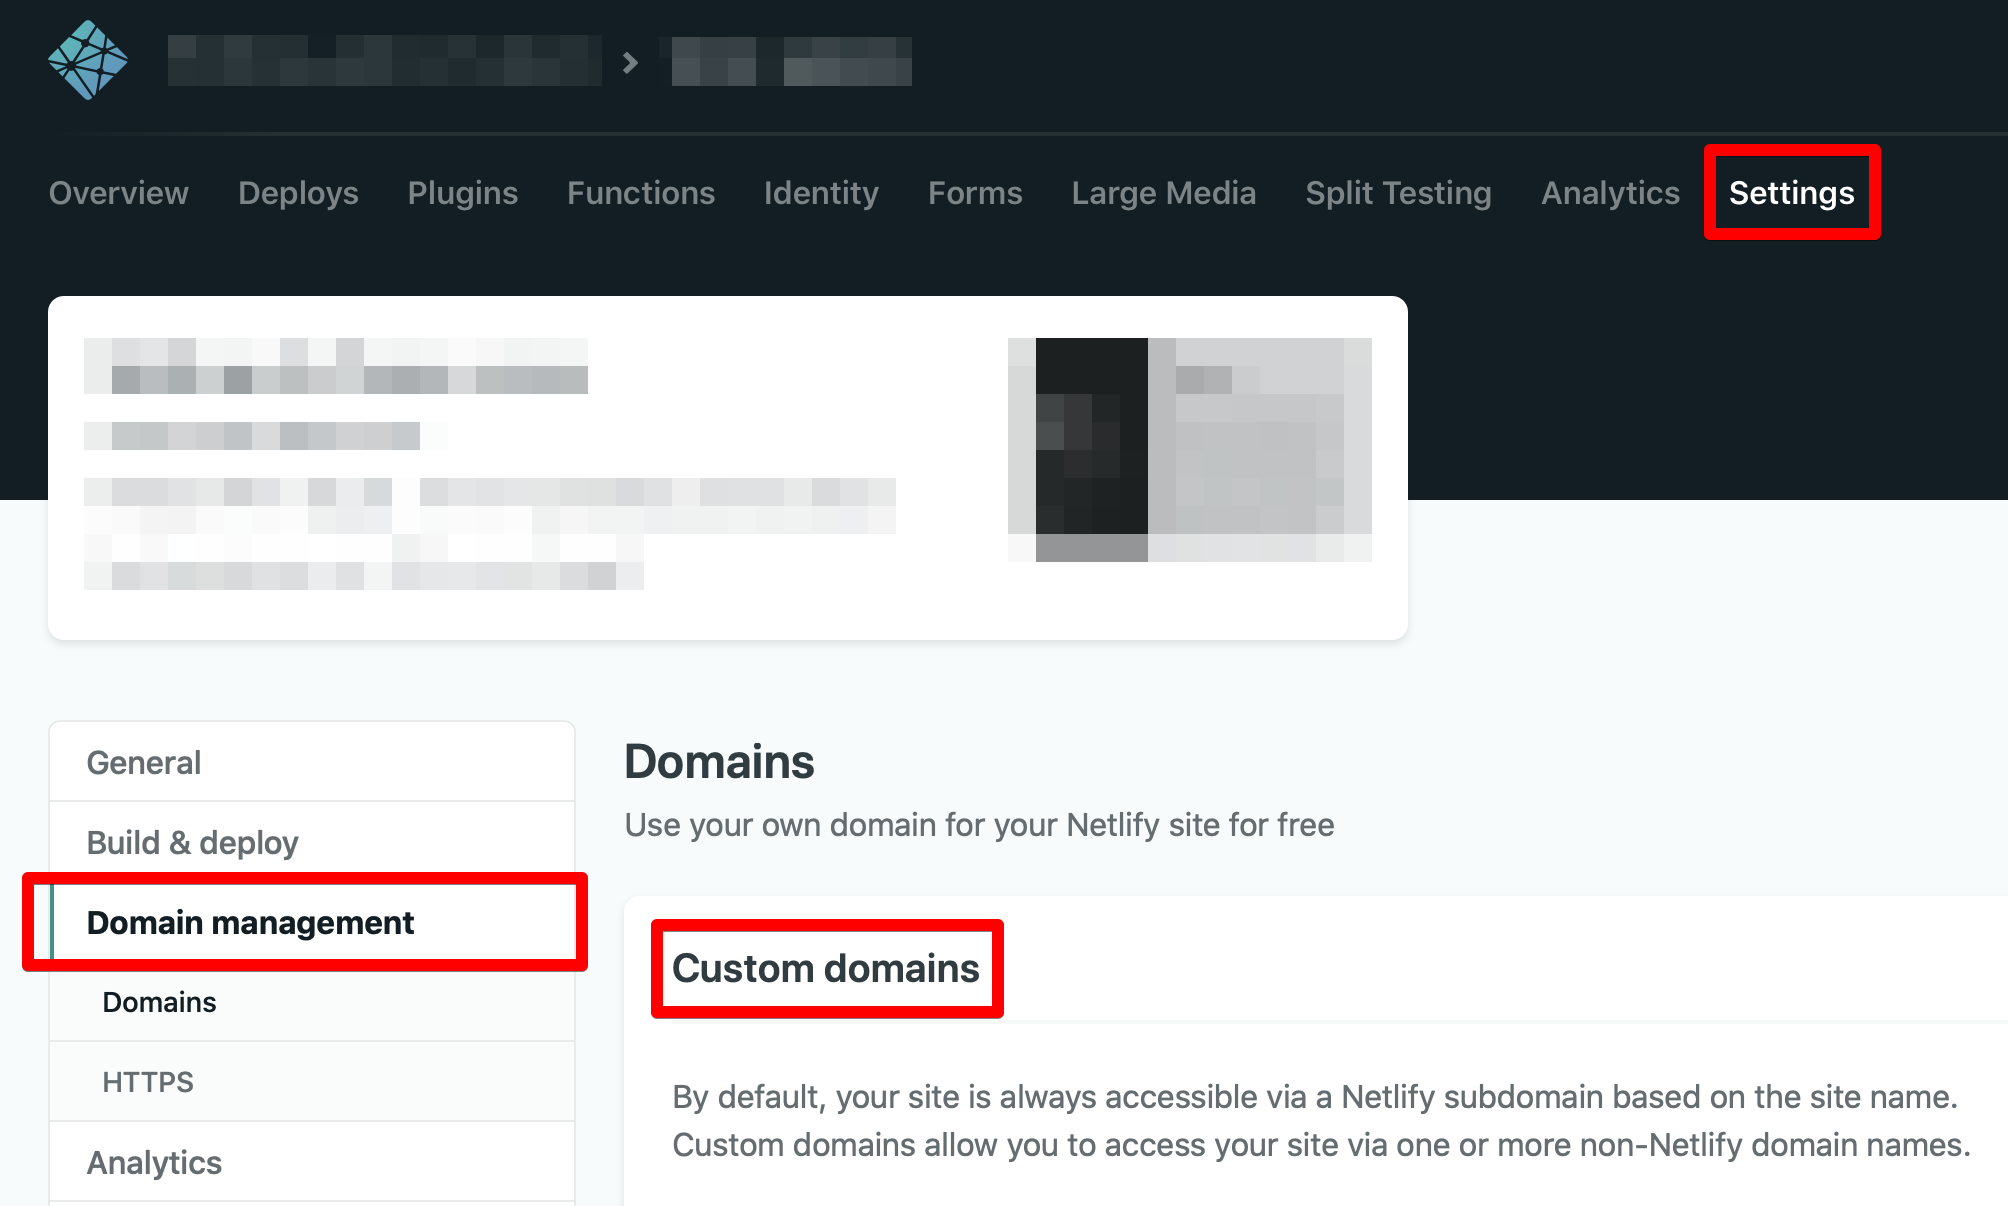
- Enable the automatic SSL certificate.
SSL certificate may show an error. This error may be caused by Let’s Encrypt trying to validate DNS settings. It may take a while but it will eventually assign it. I have seen cases when a certificate is created and the UI keeps showing an error. Just come back later and refresh the page.
As soon as DNS updates have propagated, your site will be available using your domain.
References
- Hugo. Quick start.
- Hugo. Shortcodes.
- Ananke Gohugo Theme.
- How to Hugo.
- Hugo. Host on Netlify.
- WordPress to Hugo Exporter.
- Mike Dane. Content Organization.